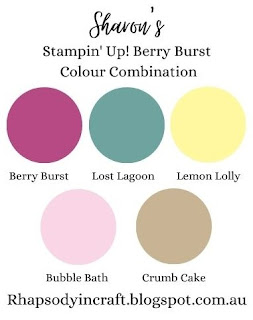
Welcome to week 12 of the 2023-24 Colour Creations Blog Hop! This week we are getting to play with a returning colour that is now part of our core colours. This week we are looking at Berry Burst!
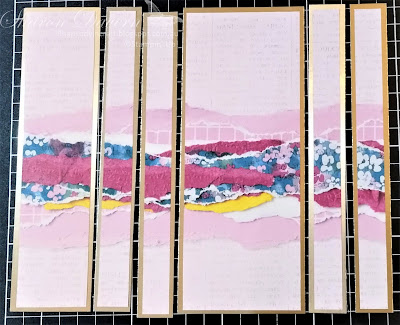
Start adhering the panels to the 2 bridge folds!
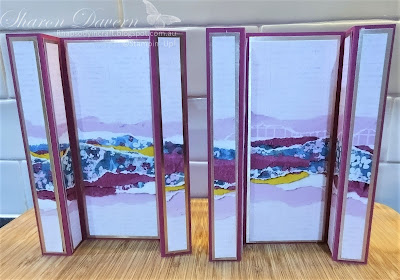
And the 2 side columns then adhere the 2 bridge folds together then adhere the 2 columns to either end.For the front focal piece is a diamond that I cut from a piece of card stock just starting with a piece 5x7 inches and finding the middle on all four sides and cutting along the diagonal. That was for the Berry Burst layer and then made the next layers a few a quarter of an inch smaller.On the Basic White layer I have stamped in Basic Gray and Lost Lagoon some elements from the Gorgeously made stamp set then cut out the 2 leaves in Lost Lagoon and Bubble Bath to adhere to the front with a double bow of twine! I have stamped Happy Birthday in Basic Gray and there is a great little label die in the die set as well.
On the back of the Birthday card I stamped this greeting for my friend from the Courage & Faith stamp set but on the recreated one I stamped the leaf in lost lagoon.
Both these card were super fun to make and I do hope you have enjoyed having a look at them today.
Berry Burst is a great colour to pair with our pinks and this week I have made 2 fancy folds for you. Ok I had started to make a fancy fold a little while ago in preparation for today then I had to make a card for a friend for her birthday and I made a completely different fancy fold and got so excited about it I shared it to our team forum and you know it was Berry Burst and I could have waited until today to share it on the blog. Well I have taken photos of it and I remade it to share it here anyway. You know being part of this team you just love sharing with each other.
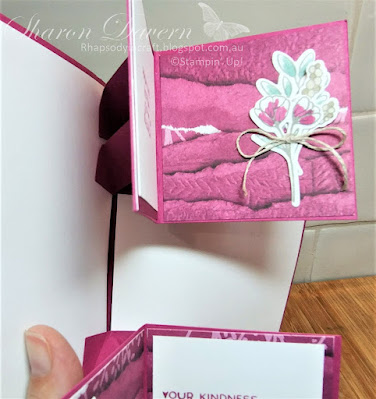
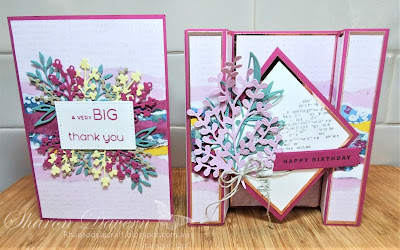
So this is card number 1. I have used the gorgeous Masterfully Made DSP on a card base of Berry Bust as this DSP has lots of gorgeous Berry Burst in it along with the Bubble Bath as you can see. Then I paired it with the Timeless Arrangements bundle. So on the front I took my colours from the paper.
OK I hear you saying "still doesn't look like a fancy fold card Sharon" Let me open it up for you and show you all the magic!On the inside of the card you have 2 sections that pop up and open out! Before I added these 2 sections I added 2 pieces of Basic White card and stamped in Berry Burst the little broken circles that I in the opposite corners. Then came the hinges and the pop ups!On the 2 internal card that I have used the Masterfully Made Berry Burst DSP I have stamped and die cut out the foliage and flowers from the Timeless Arrangements Bundle and used my blends to colour them in with Lost Lagoon, Crumb Cake and Berry Burst!
This card is a thank you card so I have used the sayings from the Timeless Arrangements Stamp set to create the flow on from the front to the last pop up.
You can write your greeting on the inside underneath the pop ups or you can add another piece of Basic White to the back of the card to write to the person you are giving this unique and special Thank you card to. Plus this card fits into our C6 envelopes.
Here is a video of the card opening
Card Number 2: I made for my friends 60th Birthday and I used all the same colours as card Number 1 but added Gold Foil. As I had already shown this card on the team forum and I had given it away I needed to recreate it for our fantastic team day that we had on the weekend. This time I used Rose Gold Foil Specialty Paper.
This card is a double bridge fold card with columns on the side! This time I used the Gorgeously Made Stamp set and Dies! Plus the Alphabet al a mode dies to cut out the 60!
For all the panels I have cut them sequentially with in the sizes along the Masterfully Made DSP so that that pattern follows all the way around the card. You can do that with any DSP you choose but I really love this piece in particular how the pattern works so well!Start adhering the panels to the 2 bridge folds!
And the 2 side columns then adhere the 2 bridge folds together then adhere the 2 columns to either end.For the front focal piece is a diamond that I cut from a piece of card stock just starting with a piece 5x7 inches and finding the middle on all four sides and cutting along the diagonal. That was for the Berry Burst layer and then made the next layers a few a quarter of an inch smaller.On the Basic White layer I have stamped in Basic Gray and Lost Lagoon some elements from the Gorgeously made stamp set then cut out the 2 leaves in Lost Lagoon and Bubble Bath to adhere to the front with a double bow of twine! I have stamped Happy Birthday in Basic Gray and there is a great little label die in the die set as well.
On the back of the Birthday card I stamped this greeting for my friend from the Courage & Faith stamp set but on the recreated one I stamped the leaf in lost lagoon.
Both these card were super fun to make and I do hope you have enjoyed having a look at them today.
If you have any questions about my 2 projects today please let me know.
Now is the time to head to the next person on our Berry Burst Journey and you will be heading to the amazing Ros Davidson just hit the next blog button and you will go straight there!
If for any reason one of the next blog button links doesn't work just head back here and go to our host Cathy Proctor and she will have a list of all those from the AWHT participating in our Berry Burst Hop this week: Cathy's Blog

.jpg)









.jpg)
.jpg)

.jpg)
8 comments:
Your fancy folds are as amazing as you, my special friend. I loved spending time with you on Saturday and seeing these creations in real life - they are incredible!
Wow, two awesome cards - you are so clever with your Fancy Folds! The papers and colours you have used are gorgeous!
Two beautiful cards, Sharon! I love the surprise of the hinged, pop-up, elements in the first card ... didn't expect them, and they add a real "wow" to your already lovely creation. The card for your friend's 60th is also very special. These are real labours of love.
Sharon as always the "queen" of fancy fold cards and so much work goes into them. I'm sure your friend would have appreciated hers. Your first card would truly give the recipient a surprise on opening.
Sharon, you sure are the Queen of fancy folds. I'm so glad we could see these IRL on Saturday, they are outstanding, and so good to see you too. The 60th birthday card is so special and there is no doubt your friend will adore it.
Wow, both cards are just amazing, what wonderful fun folds. I am sure they will be treasured by both recipients.
I'm starting to think you should have been an engineer, Sharon! These fun folds you make amaze me, and then to repeat that second one - WOW! loved the colourful bouquet on the first, and no 2.1 and 2.2 are just beautiful, thoughtful cards.
You out did yourself and I loved being able to see them in person at the event.
Post a Comment