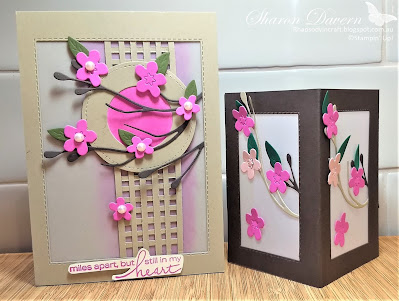
I have made a 3D object for you today instead of a card or memories page layout.
Tonight I have made you a votive candle cover/decoration that you can put over your little battery powered candle. I wouldn't want you to start a fire.
For Sarah's Birthday we had a murder mystery dinner party! You know, hold one of those kinds of parties, where all the guests are a character in the mystery. It was lots of fun and Sarah loves cluedo so it was a perfect night. We all dressed up and the scene was set in a castle and a masquerade ball so Sarah wanted lanterns. I made 12 of these very particular lanterns with so many parts. I got a very special cutting pattern to do it. It took HOURS!!! DAYS!!!
So for you I have made something that takes less than 1 hour even less than 30 minutes depending on how fast your want to work and if you get interrupted by your kids.
I thought I would match it to my card that I made in Crumb cake week especially since it is my daughter's birthday this week and there are so many cherry blossoms out at the moment.
So this is how I made it.
I cut a piece of Early Espresso card in half vertically. (10.5 x 21 cm) Then I scored 1 cm from the end. To save on measuring I folded the card stock in half up to that 1 cm score line and then each of those halves in half again. You should now have 4 equal parts excluding the 1 cm flap that you will need to adhere your candle decoration together.
Using the rectangle stitched dies I cut out the 4 holes for the windows. The vellum is cut into 6.9 cm by 10.4 cm panels so they are just smaller than each side of the box.
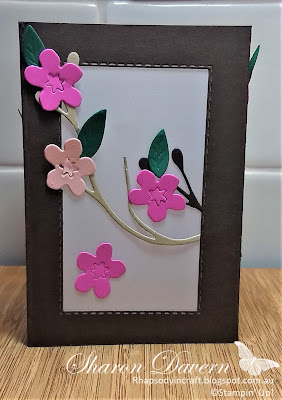
The cherry blossoms dies are just perfect and I have used Crumb Cake and Early Espresso and I adhered the branched first on the inside of the box before adhering the vellum to the inside. The Cherry blossoms are Magenta madness and Blushing Bride and Shaded spruce for the leaves are adhered with mini glue dots.
I have adhered the box together with Stampin' Seal as it is strong enough and as we are not holding together anything that needs to hold weight.
It really was very quick to put together and you can make quite a few of them in one sitting if you would like to do it for Christmas. Just change the colours for what ever colours you have chosen this year. I think I will try one with a wreath next time. I just ran out of time. Stupid migraine took over a few days.
How about you have you started thinking about your Christmas decorations yet. Come back on the 3rd Monday of the month as the team have our Christmas Showcase that day. Now please head on over to my dear friend Cathy's Blog as she is our host for the Colour Creations Showcase and she will have the list of the team participating with Early Espresso: Cathy's Blog Early Espresso
If you would like to contact me for more details on how to make this project or to purchase the product please do not hesitate to contact me.


.jpg)
.jpg)

.jpg)
10 comments:
Wow Sharon, what a wonderful 3-D project! I love cherry blossoms and all things Japanese. Thank you for joining the Colour Creations showcase with your beautiful Early Espresso card xx
Oh, Sharon, this is just delightful! Early Espresso looks so nice with pinks, and I love the bright cherry blossoms adorning your project. Beautiful.
Very clever Sharon, lovely lantern!
Gorgeous, Sharon I love the lantern so Much.
Another beautiful card Sharon. I thought the idea looked familiar.ie from crumb cake week. So much effort but well worth it
Beautiful Sharon, I love that it matches your card from a few weeks ago!
Your luminary looks amazing! The cherry blossom is perfect of the windows. The pop of pink looks wonderful with Early Espresso.
The lattern looks very pretty especially when lit up. I hope Sarah enjoyed her celebration.
Thanks for a very creative idea - love your votive candle box decorated with cherry blossoms, and quick and easy to make too! Thanks for sharing your instructions!!
This is gorgeous, Sharon. I love all the pinks with the Early Espresso - so warm and pretty.
Post a Comment