Welcome to my happy place.

Hi,

Welcome to my blog. Thank you so much for stopping by. I hope that you will find some inspiration for your projects as I have from many lovely people. This is just a little space for me to share some of my cards, scrap book pages and maybe even some of my embroidery and quilting projects.

Enjoy and stop back often.

Sharon


Showing posts with label DIY Cards. Show all posts

Tuesday, 20 November 2018

Stampin' Up - Colour Creations Blog Hop - Lemon-Lime Twist


So Santa, Festive Farmhouse, Rhapsody In Craft, Lemon-lime Twist, AWH Colour Creations Blog Hop, Christmas Cards, DIY Cards, Christmas


Welcome to week 25 of the colour creation blog hop. There are so many gorgeous colours in the Stampin' Up range and this week we are concentrating on Lemon-Lime Twist!

It is a vibrant colour and when I was thinking of what stamp set to work with in highlighting this colour all I could think of was our favourite crazy holidaying Santa from the So Santa stamp set.

Lemon-Lime Twist reminds me of summer and So Santa has gone on a surfing holiday to Australia again, I think he has taken a permanent holiday and the elves must be going frantic by now!

My First card I did with a white card base so you could see what it looks like if you had a pack of Thick Whisper White card stock to use as your card bases.
So Santa, Festive Farmhouse DSP, Lemon-Lime Twist, Rhapsody in craft, AWH Colour Creations Blog Hop, Art with Heart, Christmas card, Christmas, DIY Cards

For as simple and easy version you could use the curls and swirls texture impression embossing folder as I have here or leave it plain. I have cut a smaller piece of the Festive Farmhouse DSP. Don't you just love the plaid?  To add a little more dimension I have added a little copper foil behind the DSP but you could leave that out too! Santa is cut out using the Stitched shape framelits and offset him on a circle of Lemon-Lime Twist cut out using the layering circle framelits. I coloured using  the Stampin' Blends. I think I used 11 different colours for Santa. Isn't he just so cute? To top it all off I uses some gorgeous burlap ribbon and the cherry cobbler twine from the festive farmhouse twine collection.

Now as the Festive Farmhouse DSP was cherry cobbler I then made a cherry cobbler based card exactly the same as the white based card so you could see the difference between the 2.
So Santa, Festive Farmhouse DSP, Lemon-Lime Twist, Rhapsody in craft, Christmas Cards, Christmas, DIY cards, AWH Colour Creations Blog Hop

Very cool in either colour is So Santa.

Now because you have a Cherry Cobbler base and not the Thick Whisper White you need to have a white insert for your card so that you have somewhere to write. I have decorated the insert with a little bit of the Festive Farmhouse DSP. You could also do the same on the white card base.
So Santa, Festive Farmhouse, Lemon-Lime Twist, Rhapsody in craft, Christmas cards, Christmas, AWH Colour Creations Blog Hop, DIY Cards
I had fun with So Santa and Lemon-Lime Twist and it is a perfect colour for Christmas cards here in Australia, I hope you have a try at making your own cards.

Please make sure you go over to the lovely Cathy's Blog as she hosts our colour creations hops each week and there you will find the list of who has created with Lemon-Lime Twist this week.


If you have any questions about how to make these card or would like some goodies for your crafting fun please don't hesitate to contact me.


Thank you for spending some time with me today, take care


Wednesday, 31 October 2018

Stampin' Up - Heart of Christmas - Week 12


Tonight is week 12 of the Heart of Christmas and I have added a little twist to the top corner of my card tonight.

I was looking around for some different layouts and sketches that I might be able to use but then I saw this little twist that I hadn't come across before so I thought I would use it for my Christmas card this week.
Beautiful Baubles, Under the mistletoe, Stampin' Up, Art with heart, Christmas Cards, DIY Cards, Fancy Fold, Heart of Christmas, Rhapsody in craft

As you can see it has a little bit of a fancy twisted corner. I had not seen this twist before but it is kind of cool and it is so easy to do. Check out the end of my post for the photo tutorial!

Beautiful Baubles, Under the mistletoe, Stampin' Up, Christmas Card, Heart of Christmas, Art with Heart, Rhapsody in craft
Here is the corner without anything behind it. Rather a bit fancy.
For the Bauble I have stamped it in memento ink and used my Stampin' Blends to colour it in matching the colours from the Under the Mistletoe DSP that I have used on the card, which is in the Annual Catalogue! I then decided they were a little bit bold so I muted it slightly with the Frost White Shimmer Paint which I applied using a sponge dauber. I cut the bauble out with the stitched shape framelits and popped it up on some dimensionals and added the shimmery black organza ribbon. It has become one of my favourite ribbons from the holiday catalogue!

Beautiful Baubles, Christmas Cards, Heart of Christmas, Rhapsody in Craft,

I have layered the inside of the card and stamped this beautiful saying. When you close the card the layers look fantastic in the top corner.
Beautiful Baubles, DIY Cards, Christmas Cards, Rhapsody in Craft, Art with Heart, Heart of Christmas, Stampin' Up,

Hope you have enjoyed this weeks Heart of Christmas card. Make sure you pop on over to my lovely friend Claire Daly's blog and see who else is hopping along with some Christmas inspiration.

Please don't hesitate to contact me if you need any craft supplies of would like help in making this card.

Now for a look at how to make the corner of your card.
I actually folded my card base in half just so I could get my head in the correct spot where the twist needed to be. I have photographed in Night of Navy so you can see the contrast.
This is the top corner that you will need to cut. The whisper white square is the size of the square that that needs to be cut. It is 7.5 cm square. I cut it as a guide so you could see what I was doing.

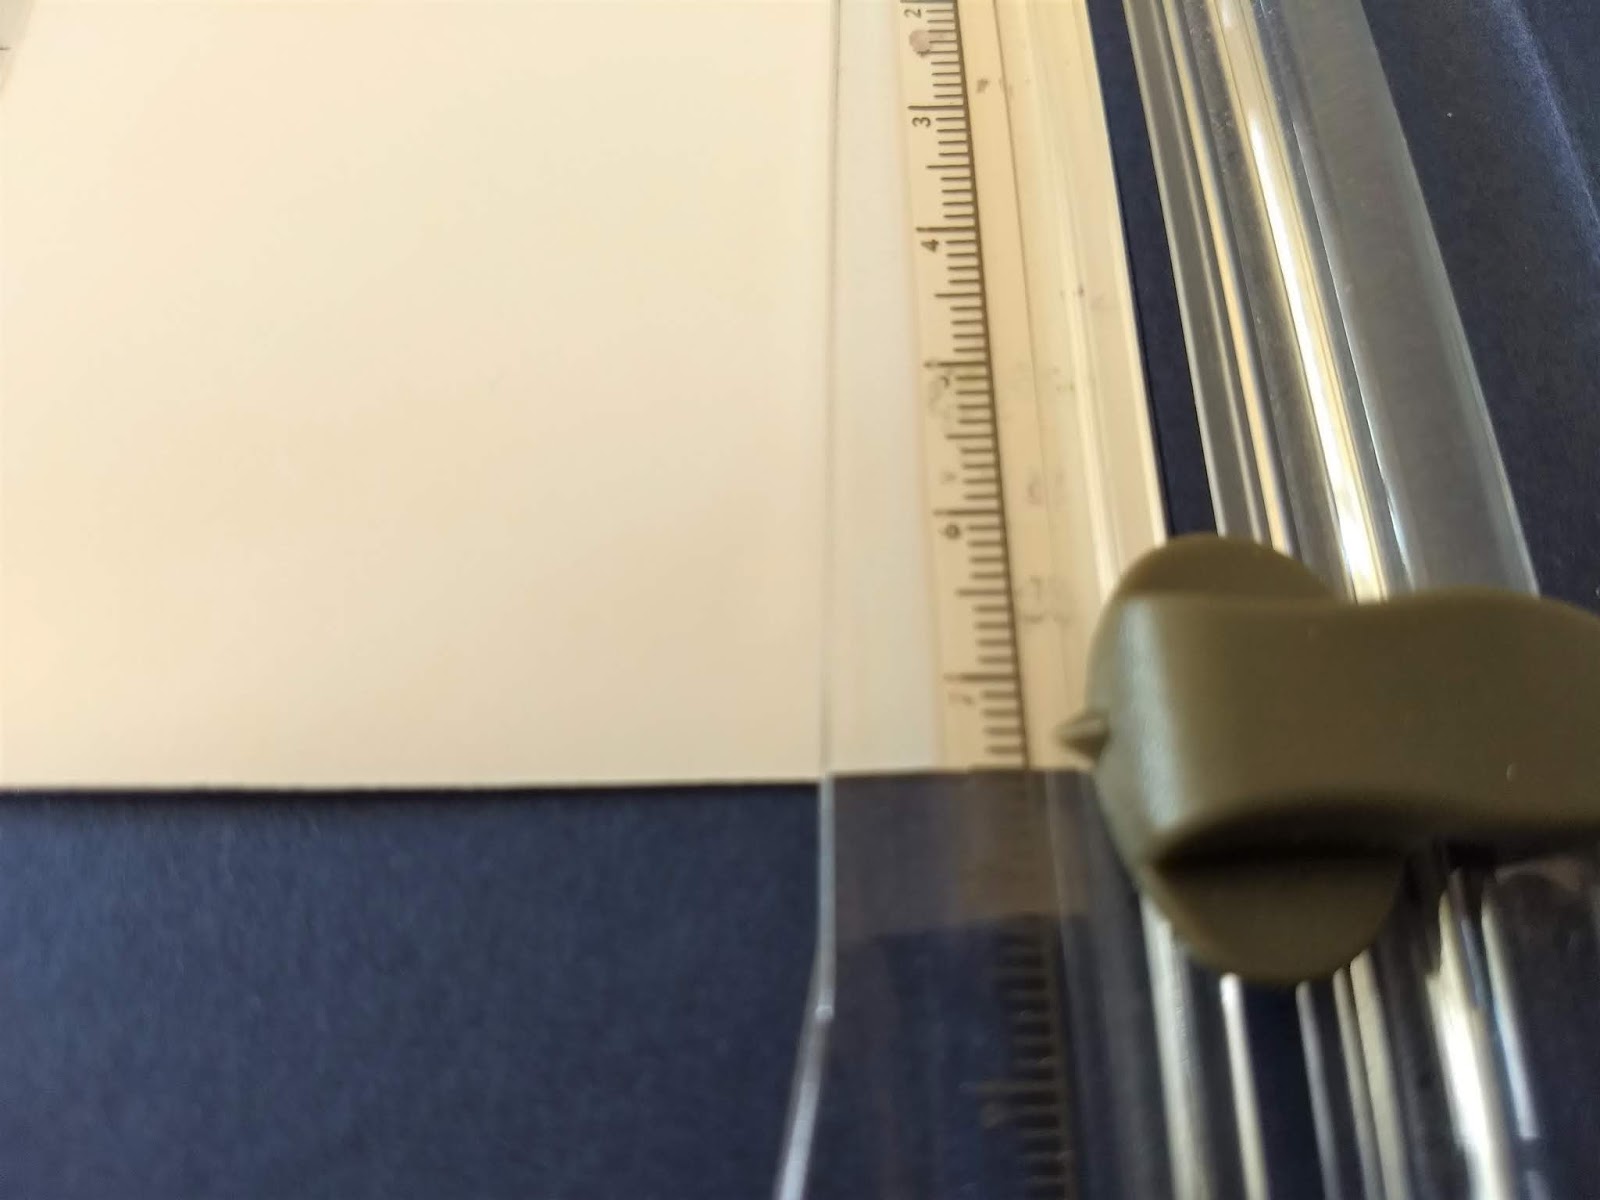
It this first cut I turned the over so that the middle fold of the card base is to your right hand side and the edge of your card is lined up with 7.5 on your trimmer.


Now move your blade to the 1 cm mark DO NOT CUT DOWN TO THE MARK just move to that spot. You will start cutting from this spot.

Now cut down to the 7.5 cm mark

 Now flip your card back over so that it looks like this with the cut mark at the bottom and the fold line still on the right hand side and line the edge of your card up at the 7.5 cm mark on your trimmer.
Now repeat the steps that we did before.


Move your blade down to 1 cm mark. DO NOT CUT. We will start cutting from here.

Cut down to the 7.5 cm mark.


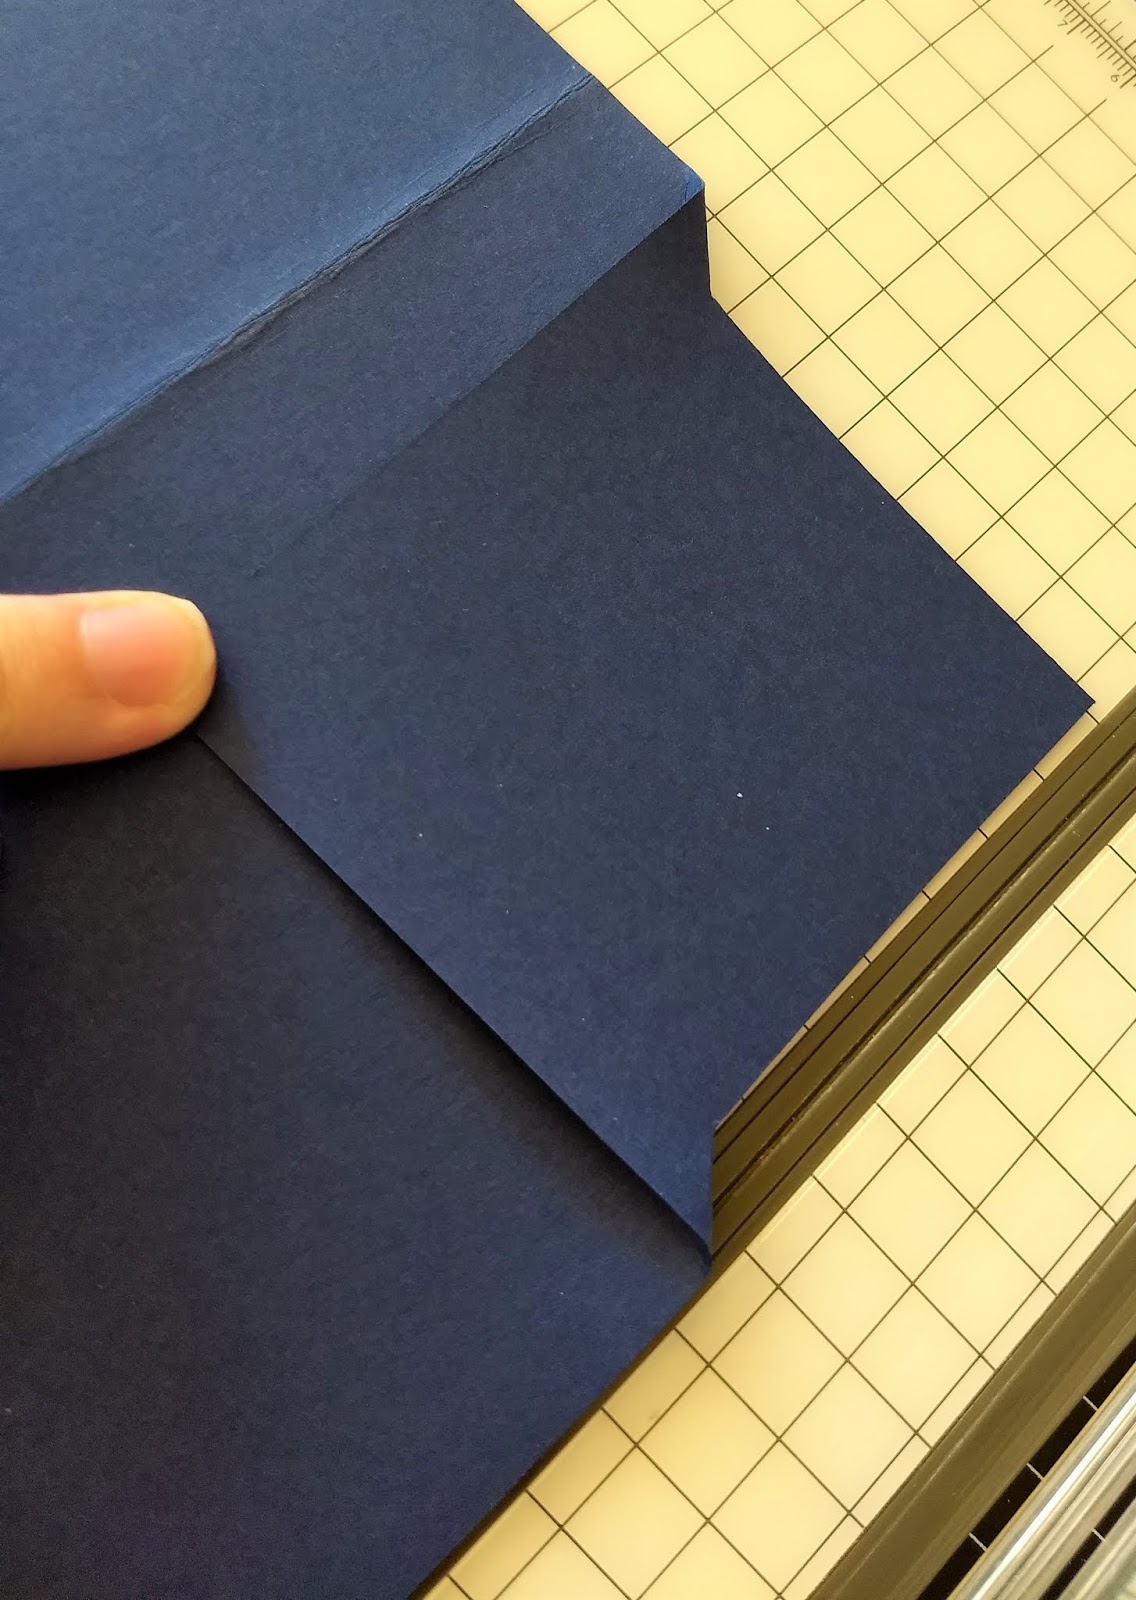
Now your card should look like this with the cuts joining up.

Fold your card base back over so that the cut is in the tip right hand corner of your card.

Now swing the cut card through the hole that you have created and then use your bone folder to burnish the 2 little corners


After you have decorated your card front to your liking adhere down the part of the card base that you have swung through so that it stays down and you can decorate it in anyway you like.

There you go. Let me know if you need help with these instructions. Let me know if you try to make this card yourself. I would love to see what you have made.

Thank you for spending some time with me tonight.
Take Care,

Tuesday, 30 October 2018

Stampin' Up - Art With Heart Colour Creations Blog Hop Week 22 - Grapefruit Grove


I am having a lot of fun when I get the chance to hop along with the Art With Heart team and challenge myself with the next colour in the list of gorgeous colours that Stampin' Up has to offer. This week it is Grapefruit Grove and it is one of the new In Colours for 2018-2020.
It is a very vibrant and gorgeous colour and I think you are going to like it a lot.
I have done a very simple and quick card for you tonight. I know you had better sit down. It is not a fancy fold card. 
Grapefruit gorve, Petal Palette, Tufted DTIEF, Subtle DTIEF, Art With Heart Colour Creations Blog Hop, DIY Cards, Nature;s Poem DSP

For this card I have embossed the Grapefruit Grove card stock twice. The first time through the big shot I embossed with the Subtle Dynamic Textured Impressions Embossing Folder ( DTIEF) and then I put it through the big shot a second time using the Tufted DTIEF.

Here is an up close look at the card stock so you can see both impressions.

It really looks gorgeous adding that extra bit of texture to the already beautiful Tufted DTIEF.

For the gorgeous Designer Series Paper I have used Nature's Poem I really love Blackberry bliss and the Petal Pink that is in this particular piece. Grapefruit Grove is one of the colours that is featured in the Nature's Poem DSP.

The Black Glittered Organdy Ribbon is just beautiful and is perfect to be the backdrop for the greeting that I have used from the stamp set Petal Palette and cut out using the Petals and More Thinlits that coordinate with this gorgeous stamp set. I popped it up on a few dimensionals.

Grapefruit Grove, Stampin' Up, Tufted DTIEF, Subtle DTIEF, Nature's Poem, Petal Palette, Art with heart colour creations blog hop, Art with heart, DIY cards

To get the design on the front of the card I have simply cut the embossed piece of grapefruit grove card stock on an angle and then the piece I had left I cut the little extra bit to add as well.

Make sure you hop on over to the lovely Cathy Proctor so that you can see more inspiration for the colour Grapefruit grove. 

Don't hesitate to contact me if you need any help in making this card or for any of your craft need.

Thank you for spending some time with me today.
Take Care
Sharon

Heart of Christmas 2025 - Week 13

  We have come to the last Heart of Christmas blog hop for 2025, I am so glad that you have been on the  journey with us this year. So for t...