One of my favourite flowers is the Magnolia and we have a very dark purple one in our neighbourhood that has a yellow rose flower just along side of it and I can't wait every spring to see my favourite rose flower right along side it. I was so excited when this stamp set was released as an online exclusive as it is so beautiful and I wanted it to shine today and only add hint of a splash of colour with the Petal Pink.For the card base I have used Thick Basic White and a layer of Gray Granite. To complete the base of the card I have dry embossed a piece of Basic White with the Birch Wood 3D Embossing Folder.On top of the our foundation I have die cut in Gray Granite the large and small magnolia and a couple of extra leaves and adhered that to the card before stamping the large Magnolia and the Seed Pod Stamp in Gray Granite ink. I then die cut both of those images and got out my Petal Pink Stampin Blends and using both the Dark and the light coloured the seed pod and the centre of the magnolia. To finish of the card I stamped the sentiment in Gray Granite and die cut it with the Stylish Shapes dies and using a little of the Petal Pink Diagonal trim underneath. Using the Dark Peal Pink Stampin' Blends I coloured the Basic Rhinestone Jewels to add a little bling to finish off the card.
Welcome to my happy place.
Welcome to my blog. Thank you so much for stopping by. I hope that you will find some inspiration for your projects as I have from many lovely people. This is just a little space for me to share some of my cards, scrap book pages and maybe even some of my embroidery and quilting projects.
Sharon
Wednesday, 13 November 2024
Colour Creations Blog Hop - Week 29 - Gray Granite - 2024-2025
One of my favourite flowers is the Magnolia and we have a very dark purple one in our neighbourhood that has a yellow rose flower just along side of it and I can't wait every spring to see my favourite rose flower right along side it. I was so excited when this stamp set was released as an online exclusive as it is so beautiful and I wanted it to shine today and only add hint of a splash of colour with the Petal Pink.For the card base I have used Thick Basic White and a layer of Gray Granite. To complete the base of the card I have dry embossed a piece of Basic White with the Birch Wood 3D Embossing Folder.On top of the our foundation I have die cut in Gray Granite the large and small magnolia and a couple of extra leaves and adhered that to the card before stamping the large Magnolia and the Seed Pod Stamp in Gray Granite ink. I then die cut both of those images and got out my Petal Pink Stampin Blends and using both the Dark and the light coloured the seed pod and the centre of the magnolia. To finish of the card I stamped the sentiment in Gray Granite and die cut it with the Stylish Shapes dies and using a little of the Petal Pink Diagonal trim underneath. Using the Dark Peal Pink Stampin' Blends I coloured the Basic Rhinestone Jewels to add a little bling to finish off the card.
Wednesday, 18 September 2024
Colour Creations Blog Hop - Week 21 - 2024 - 2025 - Crushed Curry - Swing Arm Pop Out Fun Fold Card
Here is a video of the card opening and closing for you to get a good understanding of how fun it is!
It is one of the quickest and fun fancy folds I have made in a long time and if you have any questions please do not hesitate to contact me. I can see lots of fun applications to this one!
Wednesday, 4 September 2024
Colour Creations Blog Hop - Week 19 - 2024-2025 - Copper Clay Hideaway Pop Up Card
Welcome to our weekly Colour Creations Blog Hop. This week we are looking at the lovely brown of Copper Clay.Today I have been searching the many different fancy folds around to bring you and I found one that Barry at Mituso Craft in the UK did a video for and I have recreated it using the A Little Latte Collection.As you can see from the front of the card it looks like a normal regular card it is only as it opens that you see the surprise. I will show you that in a minute. Let me tell you how I created the decoration on the front.The card base is our colour of the week Copper Clay and then I have a layer of Early Espresso. For the next layer I have used the stamps in the Love Latte stamp set and stamped in Copper Clay and Early Espresso the drops of coffee onto the Basic White card and then the coffee beans in Early Espresso to create my own background. The using the Deckled Circle Dies I have cut out a layer of Copper Clay card and the coffee cups from the A Little Latte DSP. Again using the Love Latte Dies, I have cut out the coffee Plunger in Copper Clay and the inside with the DSP and the Lemon Lolly Cup is also from the DSP. The Sentiment is stamped in Copper clay and cut out using the Deckled Rectangle Dies.
When you open the card you have another sentiment and a coffee pot, a couple of cups cut out of the DSP being handed to you and it all folds down into your coffee table. I have stamped the coffee cup in Copper Clay and used my Blender pen to draw out the ink to add a little more colour and the coffee is very strong in this one!Here is a video of the card opening for you so that you know how it works.
Wednesday, 21 August 2024
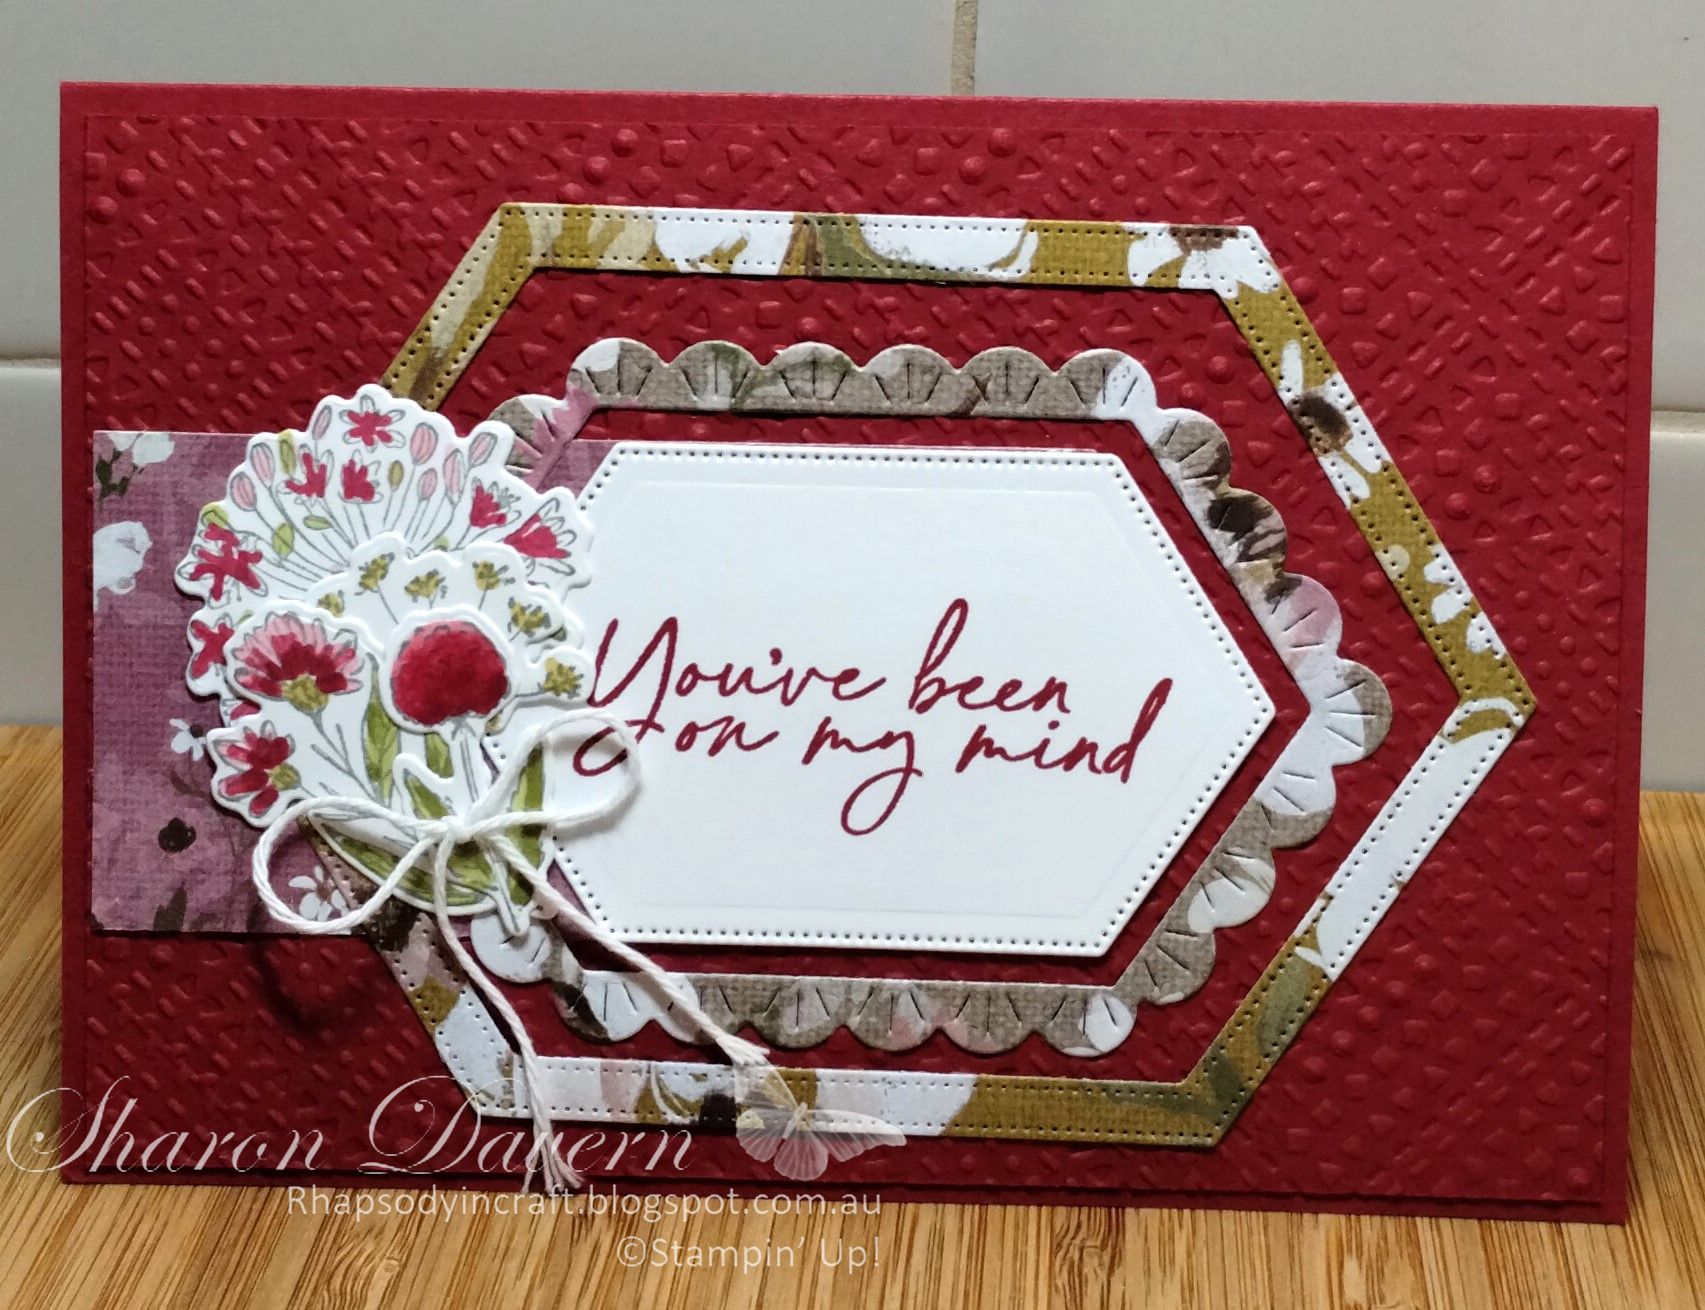
Colour Creations Blog Hop - Week 17 - 2024-2025 - Cherry Cobbler - Wildflower Designs
Now this week I have not done a fancy fold! I know what in the world Sharon! Also being a Cherry Cobbler card I specifically chose not to do a Christmas card! Again, what in the world Sharon!
My card this week is full of layers and texture but also very simple and easy to achieve. I have chosen the Wildly Flowering Suite of products. In this suite you have not only the stamp set but a lovely lot of dies that not only cut out the flowers in the stamp set but also the frames and you have a lovely Dashing Designs 3D Embossing folder and the beautiful Wildly Flowering DSP.For this card I have a base of Cherry Cobbler and then a layer on top of that in Cherry Cobbler that I have used the Dashing Designs 3D embossing folder. It gives a lovely layer and texture to the card. Then I have stamped the sentiment in Cherry Cobbler on Basic White and cut out using the Wildflower Design Dies. After I had done this I chose 3 of the patterns from the Wildly Flowering DSP to compliment Cherry Cobbler and using the Wildflower dies cut out 2 to frame and another piece to anchor the whole design to the front of the card.This photo show the bouquet of flowers from the stamp set that I have stamped in Smokey Slate and then coloured in using Light & Dark Cherry Cobbler, Light Wild Wheat, and Light & Dark Old Olive Stampin' Blends. I then used the Dies to cut them out. Of course all bouquets need a bow and I have used White Bakers Twine.Quick and simple card this week with lots of lush colours. I do hope you will give it a try!
If you have any questions please do not hesitate to contact me.
Wednesday, 14 August 2024
Colour Creations Blog Hop - Week 16 - 2024 -2025 - Calypso Coral Double Door Pop Up Card!
For my card base I have used Calypso Coral and a layer Pebbled Path before adding the gorgeous Thoughtful Journeys DSP which has some of our lovely Calypso Coral as one of its colours.
When you open the card you will see 2 doors on their opening mechanism. I have added a little Pebbled Path on the doors and then on the outer edge and on the doors I have decorated with the beautiful Thoughtful Journeys DSP.When you open your card completely the doors will fold out and on the inside of the card I have again layered with Pebble Path and on the Basic White layer I have stamped the lovely little flower stamp in Smokey Slate and the sentiment in Pebble Path. The flowers I have coloured with Stampin' Blends - Light & Dark Mossy Meadow and Light & Dark Calypso Coral.On the front of the card have cut 3 circles with the Deckled circle dies and I have embossed the Basic White layer with the Cross Hatch Embossing Folder from the Basic 3D embossing set of folders. The labels are cut from the Something Fancy Dies and I have stamped the sentiment in Pebbled Path. The leaves have been stamped in Smokey Slate and and coloured in Light & Dark Mossy Meadow. The Die Cut leaves have been blended first before die cut.I have used the blending brushes to add Calypso Coral and Mossy Meadow ink on Basic White card before cutting out the large leaf die and 2 smaller leaf dies. It doesn't have to be perfectly blended as leaves are mottled.Here is a short video of how the card opens to give you an idea of how wonderful this fun fold really is!
If you have any questions about my project today please don't hesitate to contact me.
-
Welcome to week 1 of the Heart of Christmas Blog Hop for 2024. Each week until the end of November on a Monday, members of the Art with He...
-
*****EDIT**** For the lovely people who have requested the instructions for this card. I have tried to send them to everyone. If you hav...
-
Welcome to week 7 of the Heart of Christmas 2025. This week I have for you this week a few quick and easy cards showcasing the gorgeous Tr...
Heart of Christmas 2025 - Week 13
We have come to the last Heart of Christmas blog hop for 2025, I am so glad that you have been on the journey with us this year. So for t...
.jpg)


.jpg)


.png)


.jpg)


.jpg)


.jpg)