Welcome to my happy place.

Hi,

Welcome to my blog. Thank you so much for stopping by. I hope that you will find some inspiration for your projects as I have from many lovely people. This is just a little space for me to share some of my cards, scrap book pages and maybe even some of my embroidery and quilting projects.

Enjoy and stop back often.

Sharon


Thursday, 22 February 2018

Stampin' Up - Sale-A-Bration - Art With Heart February 2018 Blog Hop


Tonight, the Art with Heart team are sharing creative projects using products from the sale-a-bration brochure. All sale-a-bration products are earned for FREE with sales of $90+ (AUD).

  • • If you spend $90, you get one free level 1 product. 
  • • If you spend $180, you get one free level 2 product, OR, they can choose two level 1 items. 
  • • If you spend $270, you have the option to choose three level 1 items or one level 1 item and one level 2 item. 


The sale-a-bration promotion is current now until March 31st. Be sure to request your copy of the brochure today.
Sale-a-bration is also a great time to join our fabulous team. Ask any of the girls on the hop!

You may have come to my blog from the lovely Ros Davidson or just come straight here, blog hops are a circle, so you can start anywhere on the hop and follow along, the links are at the end of this post.


Now tonight I have used the lovely Heartfelt Blooms stamp set. The image is just gorgeous. When I stamped the image, my daughter exclaimed “I want that stamp!”. So, I suggest to you, like my 16-year-old daughter, YOU NEED this stamp set. It is a stamp set you can get for free with a purchase of just $90 product.

I have chosen to highlight the beautiful flower image tonight by offsetting it on a twisted easel card.


To make the easel card I simply cut the base card, in this case the early espresso in half-length wise, so now you have 2 long pieces of card. Score the card in half, so that it looks like a normal folded card. Then score one half of the card diagonally. That is how I made the base and it fits into the normal C6 Envelope when folded shut.


The gorgeous blooms I have stamped in my favourite colour at them moment I think which is Rich Razzleberry and then cut is out with the Stitched shapes framelits and backed it with Tranquil Tide card stock cut with the Layering circle framelits. Making it a circle just plays with the angles of the triangle in the easel card and makes it stand out just that little bit more I think.


Such a lovely sentiment is also from the Heartfelt Blooms stamp set and I have cut this out using the Petals and More thinlits dies and popped it up on some dimensionals

To bling it up a little more I have added the delicate white doilies, gold metallic thread and some leaves in tranquil tide cut from the Petals and More thinlits dies.


On the 2 triangle parts of the base card I have used the Heartfelt Blooms stamp in crumb cake on powder pink to show you that you can also use this stamp as a back ground to your focal point image.

I have lined the inside of the card with the gorgeous silver and old olive card from the Sweet Soiree Specialty DSP. It is just beautiful paper with the silver foil running through it. To hold the easel up I have again stamped the Heartfelt bloom image in Rich Razzleberry on whisper white card stock and punched it out with the 1 1/8” scalloped punch backed it with the 1 3/8” scalloped punched rich razzleberry card and popped them up on some dimensionals.


Now you need somewhere to write on this card so turn it over and on the back of the card I have punched out using the scalloped punches again another section of the stamped image and adhered it to the card so that it is nice and decorated. Can’t have a plain place to write!


For more product information about this card check out the list below.
PRODUCTS
Stamps
Heartfelt Blooms
Card Stock and Papers
Whisper White, Rich Razzleberry, Powder Pink, Tranquil tide, Early Espresson, Sweet Soiree Specialty DSP,  
Ink
Rich Razzelberry Crumb Cake
Acecessories / Embellishments
Gold Metallic Thread, Delicate White Doilies
Tools
Petals and MoreThinlits dies, Stitched framelit dies, layering circle dies, 1 1/8” scalloped punch, 1 3/8” scalloped punch, Big Shot, Trimmer, paper snips, fast fuse, Tombow liquid glue, bone folder, dimensionals  


Now it’s time to hop on over to our next participant, the very talented, Catherine Proctor


If you find a broken link or have come to this blog hop from a different entry point, you can view the participants below:

Sharon Davern   <= You are here


Please contact me for any more information on how to make this card, on how to get your hands on the Annual Catalogue, the Occassions Catalogue, Sale-a-bration and any of your Stampin’ Up goodies.

Hope you have a lovely day. Thank you for spending some time with me.

Take Care


Thursday, 25 January 2018

Stampin' Up - Occasions Catalogue - Art With Heart January 2018 Blog Hop


Tonight the Art with Heart team are sharing creative projects using product from the occasions catalogue. The occasions catalogue is current now until 31st May. Be sure to request your copy of the catalogue today (along with the sale-a-bration brochure).
Sale-a-bration is also a great time to join our fabulous team. Ask any of the girls on the hop!

Have you ever wanted to have one of those big cakes at your birthday and someone jumps out of it and says surprise?! OK well maybe only in those old movies that I like to watch. Or have you ever wanted to decorate your cakes nice and fancy and you thought I just can’t decorate cakes like that no matter how many videos I watch! Well with the new Sweet Soiree Suite and my card today can get you a little bit closer to having a birthday cake like that!

The card I made for you today is a Triple tier slider card. This card has a cake decorated on the front and then your greeting POPS out the top!


On the front of the card I have used the gorgeous Silver foil accented Sweet Soiree Speciality Designer Series Paper as the background to my cake. In this Suite you will be able to purchase all your goodies to make the most decadent cake you have ever created!


To start with I have stamped the 2 layer cake in Berry Burst on Whisper White card using the Cake Soiree stamp set which has 18 gorgeous stamps in the set. Yes, you heard me 18! Then when you bundle it with the Sweet Cake Framelit Dies you can cut out the cake and the gorgeous cake stand which I have done in Champagne foil which is one of the carry over items from the Holiday catalogue and you can purchase that until the end of May as well. It is one of my favourites so I am so happy about that!


On the cake I have used the new Embossing Paste that is in the Occasions Catalogue. I have pared it with the Sweet Soiree Decorative Mask. The dots on the cake are in the new Silver Paste and the scalloped Edge is in the new Shimmery White Paste. They just add a little but of glimmer and class to your cakes! Who says you can’t decorate cakes like a pro!


The flowers on the top of the cake are a 2 step process as you can see I have used a background colour and then a different colour for the definition. Now you can use your stamp-a-ma-jig to line up the 2nd colour definition to get the most perfect flowers or you can wing it. It is up to you, if you are like me you have to have them lines up just perfect so I suggest the stamp-a-ma-jig. It takes too many times to get them lined up perfect without it! (Just saying) Then using the Sweet Cake Framelits Dies you can cut them out perfectly along with some twigs and leaves.

All of this I have popped up on some dimensionals on the front of the card.

Now for the magic! Remember I said I like to watch old movies where people pop out of cakes. Well the greetings in the Cake Soiree stamp set Pop out of this cake.


The little tab at the top I made by using the new Scallop Circle punches so you know that you have to pull the tiers of the cake out!


I have left the popped-out sections plain with just the greeting so that they don’t take away from the gorgeous cake on the front of the card.


For more product information on this card check out the list below.
PRODUCTS
Stamps
Cake Soiree
Card Stock and Papers
Whisper White, Berry Burst, Old Olive, Sweet Soiree Specialty DSP, Wood Texture DSP, Champagne Foil
Ink
Berry Burst, Powder Pink, Calypso Coral, Daffodil Delight, Rich Razzelberry
Acecessories / Embellishments
Gold Metallic Thread
Tools
 Silver and Shimmery White Embossing Paste,Sweet Soiree Decorative Masks, Palette Knives,Sweet Cake Framelits dies, Big Shot, 2.9 cm Scallop Punch, 3.5 cm Scallop Punch, Trimmer, paper snips, fast fuse, bone folder, dimensionals  

Now it’s time to hop on over to our next participant, the very talented, Ros Davidson.


If you find a broken link or have come to this blog hop from a different entry point, you can view the participants below:

Ros Davidson
Caroline Manwaring
Tina Gillespie
Kathryn Mangelsdorf
Rachel Palmieri 
Alisha Watson
Claire Daly 

Rebecca Jacovou
Leanne Mitchell
Kate Morgan
Monika O’Neill
Sharon Davern

Please contact me for any more information on how to make this card, on how to get your hands on the Annual Catalogue, the Occassions Catalogue and any of your Stampin’ Up goodies.
Hope you have a lovely day. Thank you for spending some time with me.

Take Care

Thursday, 23 November 2017

Stampin' Up - Add Texture With Embossing - Blog Hop with the Art with Heart Team


Hello and welcome to another beautiful day.
Hope you have had a wonderful day. Tonight the Art with Heart team girls are sharing some creative projects by adding texture with embossing. Embossing can add a lovely dimension, and with our wonderful Stampin’ Up! products, we can create many different looks. These include Heat embossing using embossing powder, dry embossing using our textured folders or by adding embossing paste!

I have made 2 projects to share with you tonight, they are quite different.

The first is a male card and I have used both an embossing folder and heat embossing to create the texture for this card. A Tarnished Faux Foil Technique is what I am calling it.


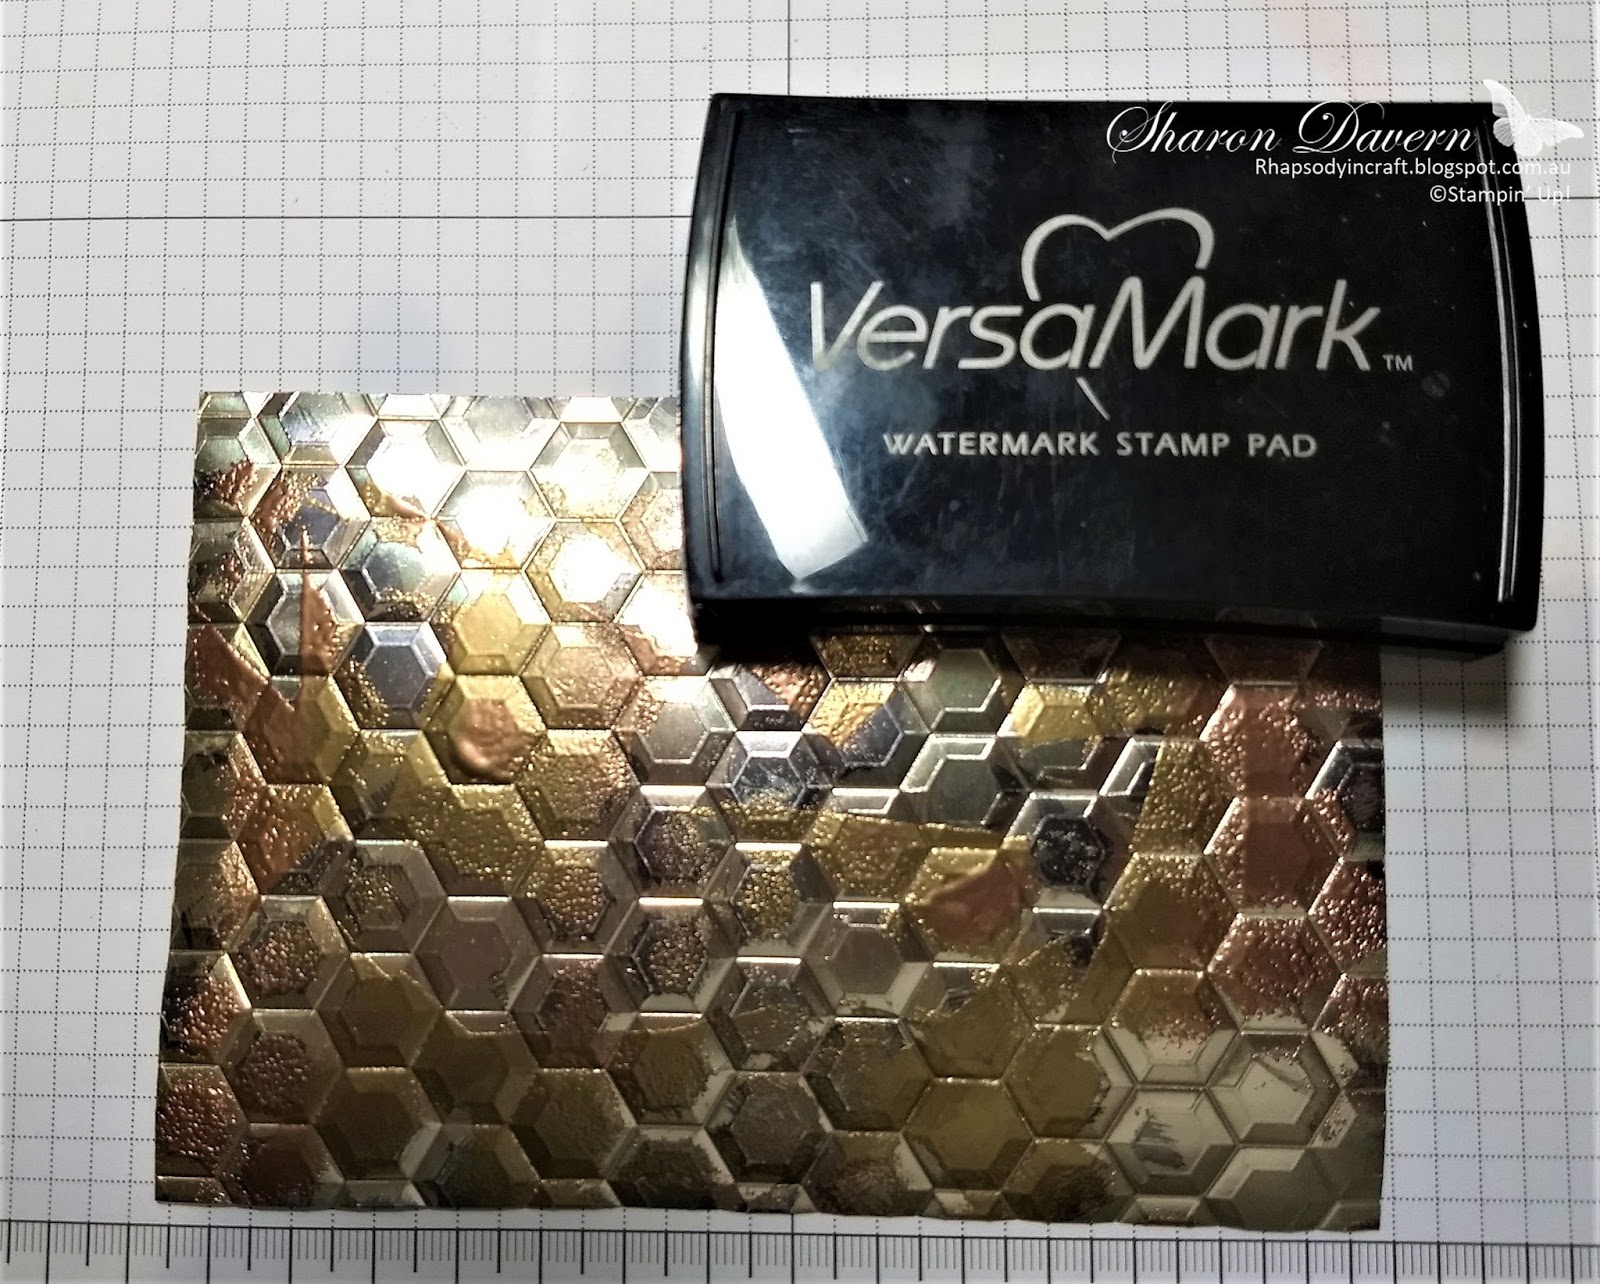
I have run the most gorgeous Champagne Foil paper through the big shot while in the Hexagon Dynamic TIEF.


After we have embossed with the hexagons I have used memento ink to create some grunge and some of the tarnished look. Just dab it randomly. You really need to let this dry completely or use your heat tool to dry it before the next staged.


The next stage is lots of fun. Grab your VersaMark and just dab it in random places over your blacked hexagons. Now sprinkle some Gold and Copper Embossing powder onto your foil making sure you still have some of the foil and the black showing through and heat set with your heat tool.


Now you have your back ground all set and ready to decorate.

I have decorated the card with some gold metallic thread and I have teased the gorgeous copper trim out to look like netting. Using the Happy Birthday Thinlit I have cut out the greeting using basic black card stock and adhered all of this to the front of the card using the fine tip glue pen.


I think this would make an excellent male birthday card.


I have made a short video showing you how I created the background to this card.

For my next project I thought I would try something a little different. I have created a background to my card by using the flower framelit in the Support ribbon framelits to emboss the card stock.

How I have done this is instead of placing the framelit on the top of the card stock I placed it under the card stock and made sure the catting side was also facing away from the card so I didn’t cut out any flowers. 

I did have to put it through a few times to create the whole background but that is ok. I them sponged the card with powder pink ink so that you could see the definition of the flowers on the whisper white cardstock. It gives just a subtle impression on the card but I’m sure a more intricate die would leave a lovely impression as well.


I have added some flowers cut with the same die from the Support ribbon framelits in Berry Burst and tranquil tide leaves and a powder pink ribbon. The gorgeous Metallic Edge Ribbon in Berry Bust I was able to get when I was at OnStage at the beginning of November and it will be available from January 3rd. You are going to love it, it is divine!


The sentiment cut out using the stitched shaped framelits is from the Ribbon of Courage stamp set and I have stamped that in Berry Burst and the inside of the card is also using the stamps from the same stamp set.


For more product information for both these cards check out the list below.
PRODUCTS
Stamps
Ribbons of Courage
Card Stock and Papers
Whisper White, Basic Black, Tranquil tide, Powder Pink, Berry Burst, Champagne Roil.
Ink
VersaMark, Berry Burst, Early Espresso, Memento
Acecessories / Embellishments
Copper Trim, Gold Metallic Trim, Berry Burst Metallic Edge Ribbon.
Tools
 Stitched shaped framelit dies, Support ribbon framelits, Heagon Dynamic TIEF, Trimmer, paper snips, fast fuse, bone folder, Gold and copper, embossing powder, heat tool, embossing buddy,  Fine tip glue pen

Now it’s time to hop on over to our next participant, the very talented and lovely Kate Morgan


 If you find a broken link or have come to this blog hop from a different entry point, you can view the participants below:

Please contact me for any more information on how to make this card, on how to get your hands on the Annual Catalogue, the Holiday Catalogue and any of your Stampin’ Up goodies.
Hope you have a lovely day. Thank you for spending some time with me.

Take Care

Wednesday, 22 November 2017

The Heart of Christmas - Week 26


Hello and welcome to another beautiful day.
Hope you have had a wonderful week.  We had such a beautiful day in Melbourne yesterday and are expecting one today as well. Welcome back to week 26 of The Heart of Christmas,


A couple of weeks ago I made a tag to put on a little bag of chocolate for the ladies from my church. We go out once a month and it was our end or year Christmas dinner. I thought you might like to know how to make them. I have used the Wise Men Form Afar stamp set and I just love it. You can find it on page 24 of the 2017 Holiday Catalogue.

Here is the front of the tag. I have gold embossed the 3 wise men on black card stock and cut it out with our stitched shaped framelit dies.


Here is the back of the tag where I have gold embossed the beautiful words and sentiments that come in this stamp set.

As you can see I have made the tag part out of real red card stock using the scalloped tag topper and also our layering circle framelits. I have made a short video to show you exactly how to make the tag.

I also wanted to make some cards to go with these chocolates and tags and to use this same colour combination. I have done 3 versions of the same card to show you how you can step it up just a little bit each time.


In this first version I have gold embossed straight onto the black card stock then adhered to a real red card base and have not added anymore embellishment. This card is easy to do with your VersaMarK, gold emboss powder and heat tool. Just make sure you use your embossing buddy so that you don’t get extra flecks of embossing powder sticking to your card.


In this second version I have added an island for the palm trees, some gold 1/8” ribbon and a metallic enamel shaped star in gold to the star to give it that extra bling.


In this 3rd version I have added all the elements of the 2nd version but I have cut out the 3 wise men with the stitched shaped framelits and backed that with real red cut with the layering circle framelit dies.


I’m sure any version your friends would love to receive or any card you make with this fabulous stamp set!

Make sure you don’t forget the inside. Here I have simply gold embossed the beautiful words that came with the stamp set and a little palm tree.


For more product information for on this card check out the list below.
PRODUCTS
Stamps
Wise Men From Afar
Card Stock and Papers
Whisper White, Basic Black, Real Red
Ink
VersaMark
Acecessories / Embellishments
1/8” Gold ribbon, Metallic Enamel Shapes
Tools
 Stitched shaped framelit dies, Layering circle framelit dies,Trimmer, paper snips, fast fuse, bone folder, Gold embossing powder, heat tool, embossing buddy,  

Claire Daly our Art with Heart team leader is hosting The Heart of  Christmas so hop on over to her blog to see the list of who played along this week from the Art with Heart team.
Please contact me for any more information on how to make this card, on how to get your hands on the Annual Catalogue, the Holiday Catalogue and any of your Stampin’ Up goodies.
Hope you have a lovely day. Thank you for spending some time with me.

Take Care

Heart of Christmas 2026 - Week 3 - September Paper Pumpkin Christmas Card Alternatives

  Welcome to week 3 of the heart of Christmas for 2026. A group of creative friends from the Art with Heart team are back with our Annual He...